





A clutter-free kitchen counter can make the entire room feel cleaner, calmer, and easier to use. When every surface is covered with appliances, mail, dishes, and containers, even simple tasks can feel frustrating. The good news is that you do not need a large kitchen or expensive storage products to make a difference.
With a few practical decisions and simple daily habits, you can keep your counters open and useful. Here is how to create a kitchen setup that looks tidy and works well for everyday life.
Start With a Complete Counter Reset
Before organizing your counters, remove everything from them. Place the items on a table, island, or nearby floor space so you can see exactly what has collected there.
Clean the empty counters, then sort the items into a few groups:
– Use every day
– Use occasionally
– Belongs somewhere else
– Needs to be donated, recycled, or discarded
– Needs a permanent storage location
This step is important because it shows how much counter space is being used by items that do not need to stay there. You may also notice duplicates, forgotten supplies, or appliances you rarely use.
Try not to put anything back automatically. Each item should earn its place based on how often you use it and whether it supports your normal kitchen routine.
Decide What Deserves Counter Space
Not every kitchen item needs to be stored out of sight. Appliances and tools that you use daily may be more convenient on the counter. The goal is not to remove everything, but to keep only the items that are useful and intentional.
Keep daily-use items nearby
Common examples include:
– A coffee maker used each morning
– A toaster used several times a week
– A knife block used regularly
– A fruit bowl that helps your household eat more fresh fruit
If an item is used every day and is difficult to put away, keeping it on the counter may make sense. Group similar items together and leave enough space around them for easy cleaning.
Store occasional items elsewhere
Appliances used only once or twice a month usually do not need a permanent spot on the counter. Store them in a cabinet, pantry, closet, or nearby utility area.
Examples may include:
– Stand mixers
– Slow cookers
– Waffle makers
– Food processors
– Specialty baking tools
A simple rule is to store less frequently used items in harder-to-reach places and keep everyday tools in the easiest locations.
Create a Home for Common Clutter
Counters often become cluttered when items do not have a clear place to go. Mail, keys, reusable bags, chargers, and school supplies can quickly spread across the kitchen.
Create a small drop zone away from food preparation areas. Depending on your layout, this could be:
– A basket near the entrance
– A wall organizer
– A drawer for small items
– A tray on a side table
– Hooks for keys and reusable bags
The important part is giving each category a specific home. A basket labeled for incoming mail can prevent papers from covering the counter. A small container near the door can hold keys and sunglasses.
Avoid using the kitchen counter as a general storage area simply because it is convenient. A nearby drop zone can provide the same convenience without taking over your work surfaces.
Use Vertical Space
When cabinet and drawer space is limited, look upward. Vertical storage can help free the counters while keeping frequently used items accessible.
Consider adding:
– A wall-mounted rail for utensils
– Hooks beneath cabinets
– A magnetic strip for suitable kitchen tools
– A shelf for spices or small containers
– A pegboard for flexible storage
– A rack inside a cabinet door
Use vertical storage carefully. Too many items on the wall can make the kitchen look busy, so choose one or two systems that match your needs. Keep the most frequently used items within easy reach and avoid placing heavy objects where they could fall.
Organize Cabinets and Drawers
A cluttered counter may be a sign that the storage spaces underneath are difficult to use. If cabinets are overcrowded, people naturally leave items out because putting them away feels inconvenient.
Make cabinets easier to use by grouping similar items together. For example, keep baking supplies in one area, cooking tools in another, and food storage containers in a dedicated section.
Helpful organizing tools include:
– Drawer dividers
– Shelf risers
– Pull-out bins
– Clear containers
– Lazy Susans
– Vertical dividers for baking sheets
Do not fill every space to its maximum capacity. Leave some room so items can be returned easily. Storage works best when it supports your habits instead of requiring perfect maintenance.
Manage Small Appliances
Small appliances often take up more counter space than expected. To control them, choose a storage rule that fits your kitchen.
You might keep only one or two appliances on display and store the rest in a cabinet. Another option is to create an appliance station in one area, rather than spreading appliances across the entire counter.
If an appliance is difficult to lift or use because it is stored too far away, consider a sliding shelf or a lower cabinet. The best storage solution is one that makes the appliance easy enough to retrieve that you will actually put it away afterward.
Also check cords and accessories. Store attachments in a labeled container near the appliance so they do not become separate sources of clutter.
Clear the Counters After Each Meal
A short reset after breakfast, lunch, and dinner can prevent clutter from building up. You do not need to complete a full cleaning session every time. Focus on returning items to their proper locations.
A basic reset might include:
- Put away ingredients and food containers.
- Load or wash dishes.
- Wipe food preparation areas.
- Return appliances and tools to storage.
- Move mail and personal items to the drop zone.
- Empty the trash if needed.
This routine may take only a few minutes, but it keeps small messes from becoming overwhelming. If you live with others, assign simple tasks so the responsibility does not fall on one person.
Use Trays to Contain Necessary Items
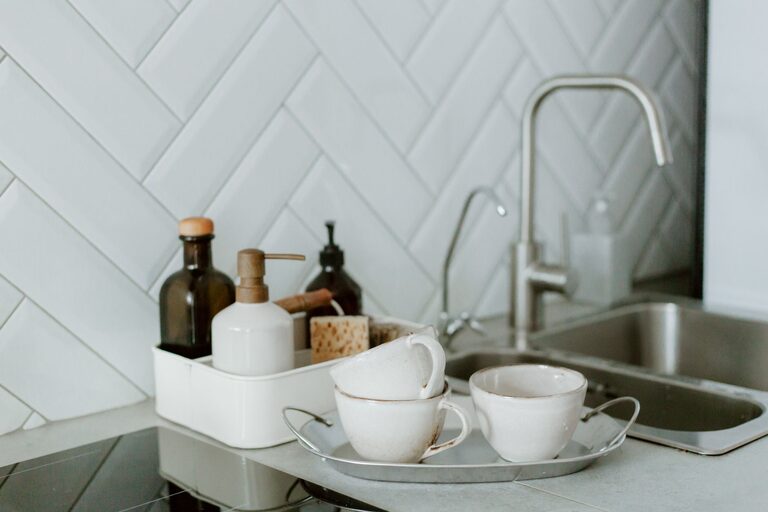
Some items need to stay on the counter, but they can still look organized when grouped on a tray. A tray creates a visual boundary and makes it easier to move several items when you need more workspace.
You could use a tray for:
– Coffee supplies
– Cooking oils and seasonings
– Soap and a sponge
– Frequently used breakfast items
– A small collection of decorative pieces
Choose a tray that is easy to wipe clean and large enough to hold the items without overcrowding. If the tray becomes too full, remove anything that is not essential.
Make Cleaning Easy
The easier a surface is to clean, the more likely you are to keep it clear. Avoid storing items directly around the sink or stove if they block access to crumbs, spills, or splashes.
Use containers that can be wiped down, and check areas beneath small appliances regularly. Store cleaning supplies where they are easy to reach, but keep them separate from food and cooking tools.
A clear counter also helps you notice problems sooner. Spills, crumbs, and expired items are easier to spot when they are not hidden beneath piles of objects.
Build a Weekly Decluttering Habit
Daily resets handle ordinary messes, but a weekly review keeps clutter from slowly returning. Choose a regular time to look over the counters, refrigerator top, pantry area, and nearby drop zones.
Ask yourself:
– Did anything remain unused this week?
– Are there items that belong in another room?
– Is a storage area becoming too full?
– Are there duplicates that can be removed?
– Does the current setup still fit our routine?
Small adjustments are easier than large organizing projects. If a particular area keeps becoming cluttered, change the system rather than repeatedly blaming yourself for the mess.
Keep the System Simple
The most effective clutter-free kitchen is not necessarily the most minimal one. It is a kitchen where items have clear homes, daily routines are easy to follow, and storage matches the way you live.
Start with one counter or one problem area. Remove anything unnecessary, create a home for the remaining items, and add a quick reset to your routine. Over time, these small changes can give you more workspace and make the kitchen feel more comfortable every day.